BUILD YOUR OWN HOUSE! Home * Site Menu *Ask Ailsa * Photo Gallery *Recipes * Tips * Carbon Monoxide Detector * Home Improvement Shopping * 10 Tips to Sell Your House Faster! * Mortgages & Other Financial Stuff! * Real Estate * Home Improvement * Online Education * Travel *Fundraising *Insurance *Linens 'n Things * Decorating *Business Cards * Shoes & Clothes! * My Amazon Page * Jewelry* Flowers * Steve Madden Shoes *Financial Prayer * Skin Care * Fitness At Home * Sex Tip * Freebies! * Books & Magazines *Personal Breathalizer ** Shopping * Astrology * Gifts for Women * Tell a Friend about This Site - How to Grout the Tiles
How to Tile
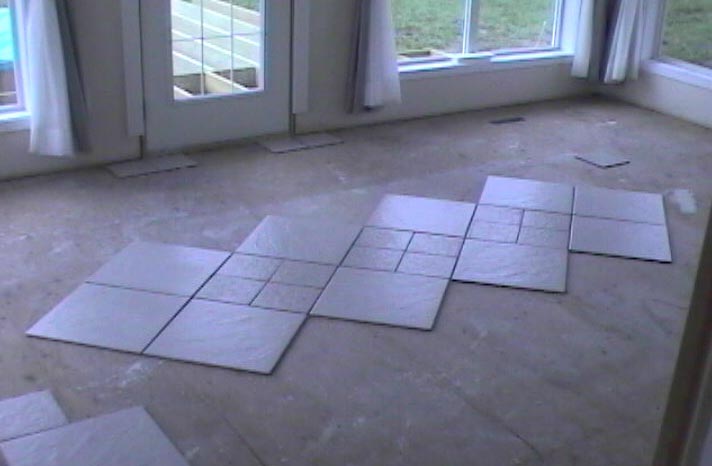
This is our Sunroom at the Tiling Stage...


Clean the Floor completely and Lay out the Pattern. (Guess who got the lucky job of Cleaning the Floor?? That's right -- Meee! I get all the 'Glory Jobs'! The good thing is that I know that every job is critical to the End Product, and I happen to like the 'Glory Jobs'! )
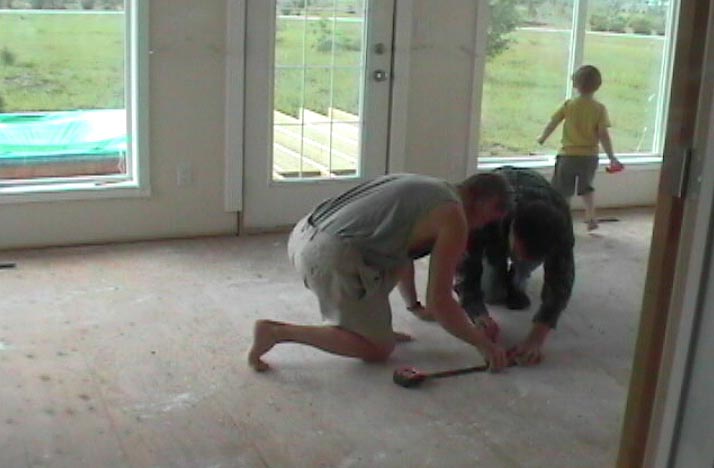
Find the exact center of the room and mark it.

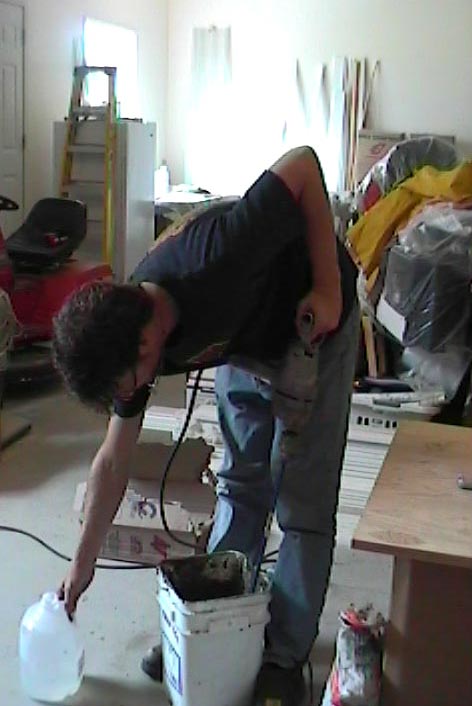

Mix the Mud to Lay the Tiles. You need to follow the directions on the Package, then sometimes add a bit more water until you have the consistency of a thick batter.


This first picture is just to show you the pattern you will make on the Floor or Wall by dragging your Large Knotched Trowel through the Mud, although if you are working with Wall Tile, you'll use a product called 'Mastik'.
Go to the Tile Section of the Hardware Store to get all the tools you'll need to complete the job. You should be able to Rent the Mixer there, too, or go to a Tool Rental Center.


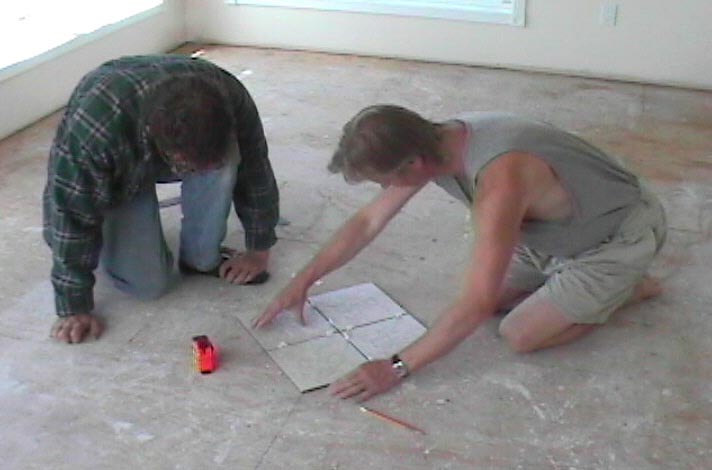
Dwight and Steve have found the Center of the Room and have drawn a full square where the First Set of Four Tiles for the In-laid pattern will go.
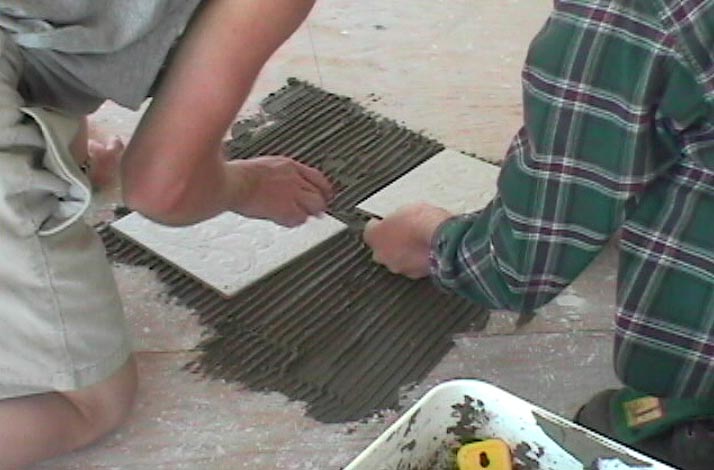
You put a few mounds of Mud on the Floor with the Spatula, then spread it around to create thick grooves with a Large Knotched Trowel. It is especially important to make the grooves thick when you are working with Large Tile (16" or more).
In the Second Picture, Steve is 'Buttering' the Tile. You put one 'mound' of mud on the back of the tile and smooth it out with a Small Toothed Trowel. I prefer the Plastic Trowels, because they don't make that horrible scraping sound, but when you're in a hurry, I'm sure you'll be happy to put up with any annoying noise to get the job done!

To Set the Tile, you put it along the Straight Line, then gently let it drop. It'll be firmly in place, then you can adjust it to make sure it's evenly set all around.
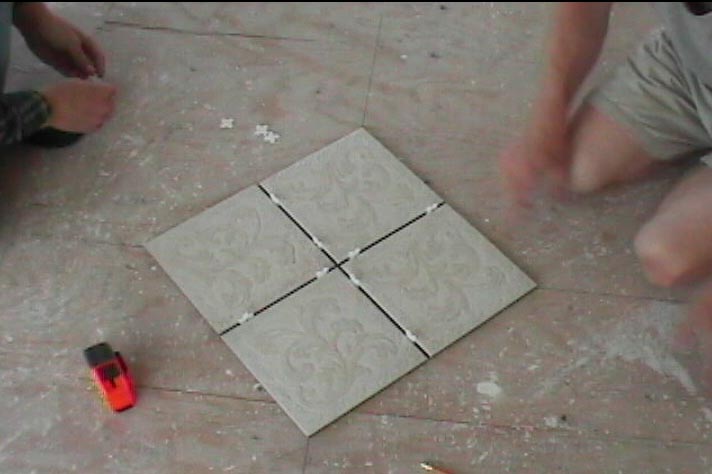
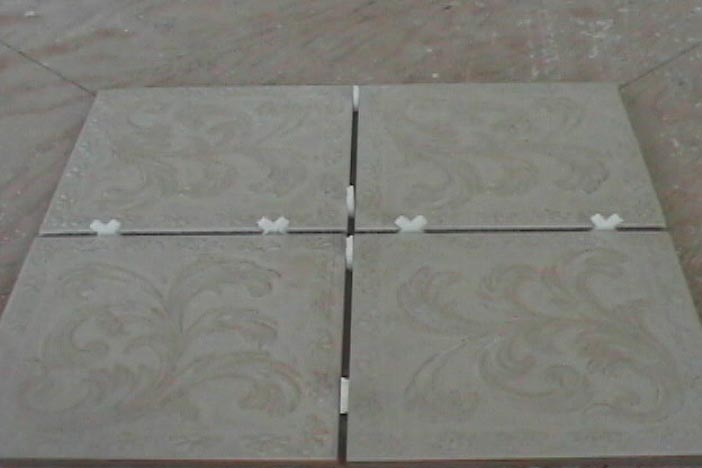
Place the Spacers in between the Tiles so they'll stay in place. Putting them upright will give you a tighter Grout Line.
 Well, I don't know if you can see the little chip in this tile, so I circled
it. Even though it's a tiny chip, you would want to save this for a Corner
Piece, so you could still use the Tile, just for a cut piece.
Well, I don't know if you can see the little chip in this tile, so I circled
it. Even though it's a tiny chip, you would want to save this for a Corner
Piece, so you could still use the Tile, just for a cut piece.


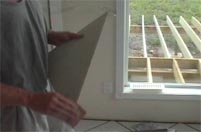
Here's Dwight cutting the Tiles on an Angle. This is Dwight's favorite Tile Cutter because it can cut up to a 24" Tile. We are very partial to the big tiles, now. The tiles for the Steam Room are 18", and the tiles in this Sunroom are 16" Laid on an Angle with the five sets of four 4" tiles to form the inlaid pattern.
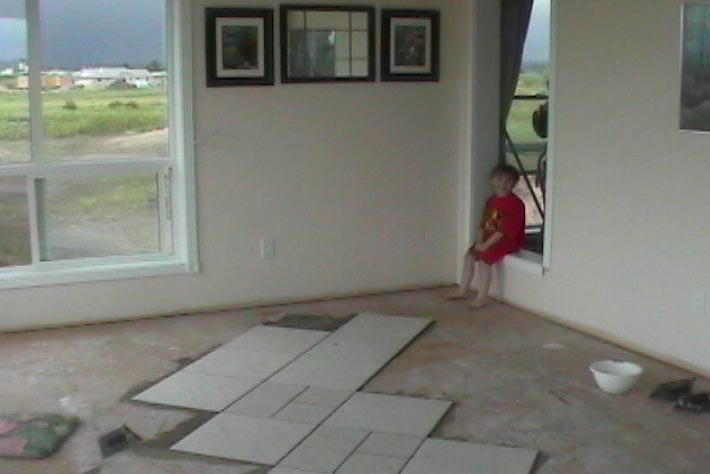


There's Aidan in the Corner Window that goes to our Master Bedroom -- the Sunroom is adjacent to the Master, a very nice feature! You can see that I removed all the Curtains -- better to be safe than sorry... it only takes a second to stand up and get Mud all over the curtains!
You start in the Center of the room and make your way into the farthest corner from you -- whichever corner will allow you to continue working without being boxed in.


When you've laid a tile, there will be excess mud around the edges. If you're not going to continue working in that direction, or it's break time (!), take the Spatula (can't think if that's the correct name, but that's what I call it! I think Tiling is very similar to baking!) and slide it under the mud along the edge of the tile. Have an old tile box handy to put any excess mud and other junk into.


Now Dwight is measuring for the Schluter Molding (spelling?? I have no idea how to actually spell this!) -- sometimes it is just called Tile Trim, or an assortment of other names, but you'll find it nestled in the Tile Section, too. The Hardware Stores are kind enough to organize everything you will need for the entire job in one neat little area! You can buy all this stuff on-line, too -- even the tile. In fact, some of the best deals around are on-line, not too surprisingly...
The Schluter Molding is the transition piece between the Carpet and the Tile. Measure it very carefully, then cut and file it down to a smooth edge.
All the Cut Tiles along the Molding have to be sanded, too, to make sure no-one cuts their foot on a sharp edge.
The Molding goes over the Carpet Edge and is Nailed to the Wooden Floor. Dwight likes Roofing Nails because they cover a good portion of the Molding.

Here's Dwightie checking the Molding... and sanding the Cut Edge of a Corner Cut Tile.

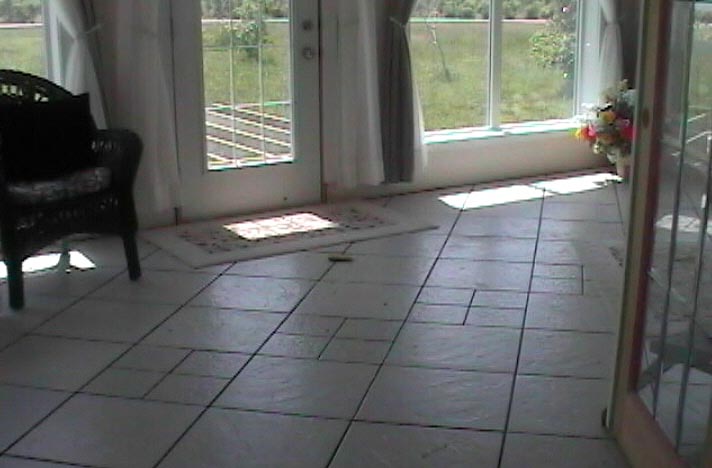

And here's the Sunroom almost done -- we just need to Grout with a nice Biscuit Color and we're all done!
That's my 'Settee' where I like to Read -- what a gorgeous room this is!
First, choose a nice color to compliment the tile.
Mix the Grout according to the Package Directions, making it the texture of paste.
There's a device called a 'Floater' that you can get in the Tile Section, too. You could use a spatula or make a little thing that looks like an Icing Dispenser you would use for cake decorating... I'll make one and take a picture of it for you when I get around to Grouting the Sunroom!
Oh, I just thought of an easy way for you to make an Icing Bag -- take a Large Freezer Bag and cut a wee bit off the bottom corner. Most Grout Lines are between 1/16th to 1/4 of an inch, so make the hole accordingly.
Clean the floor and all the lines in between the tiles. Vacuflo is a great little tool for this!
Push the Grout in between the tiles, making sure to avoid any air bubbles. (That's Dwight's job! I'm Grout 'cleaner-upper'! It's a good skill to have, because it's the difference between a okay looking job and a gorgeous job.)
Now to clean it off -- Wail 'til the Grout has hardened a bit -- about 15 minutes. Start in the area where the person applying the Grout first began. That area will be ready to 'clean' first'.
Some people use enormous sponges to clean the grout, but I find the small Scotch-Brite Heavy Duty Sponges are much easier to control, especially with fine lines.
Get a big bucket of Hot Water, (not so hot that you can't put your hands in, though!) and your sponges. Have at least 3 or 4 on hand before you get started.
Put all the Sponges in the Bucket of Hot Water. Wring out one sponge, and gently remove all the Grout from the inside of the tile. This might take a while. Frequently rinse off your sponge.
Now for the tricky part -- the actual Grout Line. Carefully run a nice clean, but wet, sponge along the Grout Line. Get your finger wet and run it along the entire line to make the grout really smooth. It'll look great!
Just work your way around the room until you're done. Change the water often and remember to dump it outside, since it's gritty and shouldn't go down the sink.
Good luck!
I've added some 'Grouting Tips' to my At Home With Ailsa Page, so come on over a check them out! (Then you can come over for a visit any time you like -- I'm doing a Daily Update, now, and it's a lot of fun!)
Ask Ailsa * Ask Ailsa * Ailsa's Biography
Building * Introduction - Overview For Building *Complete Printable Checklist *Material List - House Plans - How to Deal With Contractors - Time-Line for Our Build - How to Tile - Business Page* Home Improvement Shopping - Photo Gallery - House Plans - ehouseplans.com *
Renovations * Home
Improvement - Easy
Home Renovations - How
to Deal With Contractors - How
to Tile - Business
Page* Home
Improvement Shopping - <
Links
to iHomeowner.com Homepage > Hints, tips and deals for the homeowner!
Timeline for Our House Build * Time-Line for Our Build - Stage 1 - - Stage 2 * Stage 3 * Stage 4 * Stage 5 * Stage 6
Photo
Gallery *Photo
Gallery - House
Plans - How
to Tile - Land
- House Plans/ Blueprints -Excavation
- Foundation - Framing
- Windows & Doors - Plumbing
- Driveway - Mechanical
& Electrical - Interior
Walls & Stairs - Garage - Exterior
Finish (Scratch Coat) - Lighting
- Kitchen Cabinetry -
Flooring - Appliances
- Exterior Finish (Stucco)
- House Wrap - Scratch
Coat - Decks & Patios
- KITCHEN ISLAND -
Fireplaces -
Insulation - Moving
Day! - Decorating -
Sunroom
- Landscaping
- Linens 'N Things - Tia,
The Dog! - ehouseplans.com
- Quick
House Overview!
Money *Mortgage Info Made Easy! - Get a Mortgage - Buy Your Own Home! - Down Payment - Insurance
At Home with Ailsa -- My Update Page*Ask Ailsa*Business Page*Skin Care * Fitness At Home *Apple Crumble Diet*Weight Loss Tips!* Easy Recipes * Tips *Marry Rich -- Don't Worry -- It's Tongue-in-Cheek!* Home Remedy for Colds & Viruses!*Childproofing* Home Improvement Shopping * Ailsa's Biography *Tia -- The Dog!* Great Gifts *Online Education * Careers & Employees * Travel *Gambling* Links * More Links!*
Personal Breathalizer* Books & Magazines *Financial Prayer -- It Might Help!*Fantastic Freebies! * Cool Stuff for Students * Women in the Trades *Stephen Robert Johns -- The Artist!* Fan Mail!*Breast Cancer Research & Stamps*ClubMom Articles* Internet Connections * Insurance*Shakespeare*Scottish Highland Games * *My Amazon Page**Home Improvement Shopping!*Decorating Supplies*Great Shopping!*Jewelry*Business Cards*SPORTS*Drugstore Stuff*Movies, Music & TV*Carbon Monoxide Detector*Webmasters** Contests *Custom Buffwear*Contact Ailsa* Site Menu
Photo Gallery Step-by-Step Pictures of the Entire Building Process! Everything From the Photo Gallery... Land *** House Plans (All About Blueprints!) ** Excavation ** Foundation **Framing** Windows & Doors ** Plumbing *Driveway**Mechanical & Electrical** Interior Walls & Stairs**Garage ***Exterior Finish (Scratch Coat) ** Lighting**Kitchen Cabinetry** Flooring **Appliances **Exterior Finish (Stucco) * House Wrap* Scratch Coat *Decks & Patios** KITCHEN ISLAND * Fireplaces* Insulation* Moving Day! ***Decorating* Sunroom **Landscaping*** Linens 'N Things*** Time-Line for Our Build.
Recipes --Fruit Puffs, Cinnamon Buns, Cheesecake , Salsa Chicken , Macaroni Salad , Taco Spaghetti , Easy Schmeasy Pie Crust , Creamy Peach Pie , Great BBQ Marinade , 'Pass da' Pasta , Rosemary Steak, Onion Barley (an Aphrodisiac!), Apple Crumble for One , Barbequed Meatballs , Barbequed Veggies, Stuffed Peppers, BBQ Veggies, Chicken Noodle Soup, Soft Tacos, Blueberry Tart, Everything Else!!
<
Webmasters - SHOPPING - Homepage
Click Here to Visit 'At Home With Ailsa'!